For those of you of a certain age, you may remember those interminable evenings spent watching somebody’s vacation 35 mm slides projected onto their living room wall. For those of you under that certain age, think Powerpoint or similar slidedecks. Back before photography was a thing, people would paint photos onto glass and use a light to illuminate them and would use optics to project them as well. Then photography came along, and somebody figured out how to put photographic transparencies onto glass plates. That’s not a very accurate and definitely not a complete history of magic lantern/glass lantern/35mm slides ever written, but since there’s plenty of those types of things to be found and I wanted to get on to my point about the glass lantern slides we have, I’ll let you seek out other sources if you want to look into this further.
At any rate, we don’t have a lot of glass lantern slides in our collections: they tended to be popular in a time for which we don’t have a lot of collections and when you start thinking about how well glass would do during transport, well, you can see why maybe not so many survived as were created.
But back in the day, glass lantern slides were used by people going out on speaking tours to add visuals to their presentations. Some were sold commercially, or you could have your own photos placed onto them. For all that they’re glass, the images themselves are reasonably sturdy.

A commercially produced glass lantern slide from a series about the Klondike gold rush. By the Pacific Stereopticon Company of Los Angeles, California.
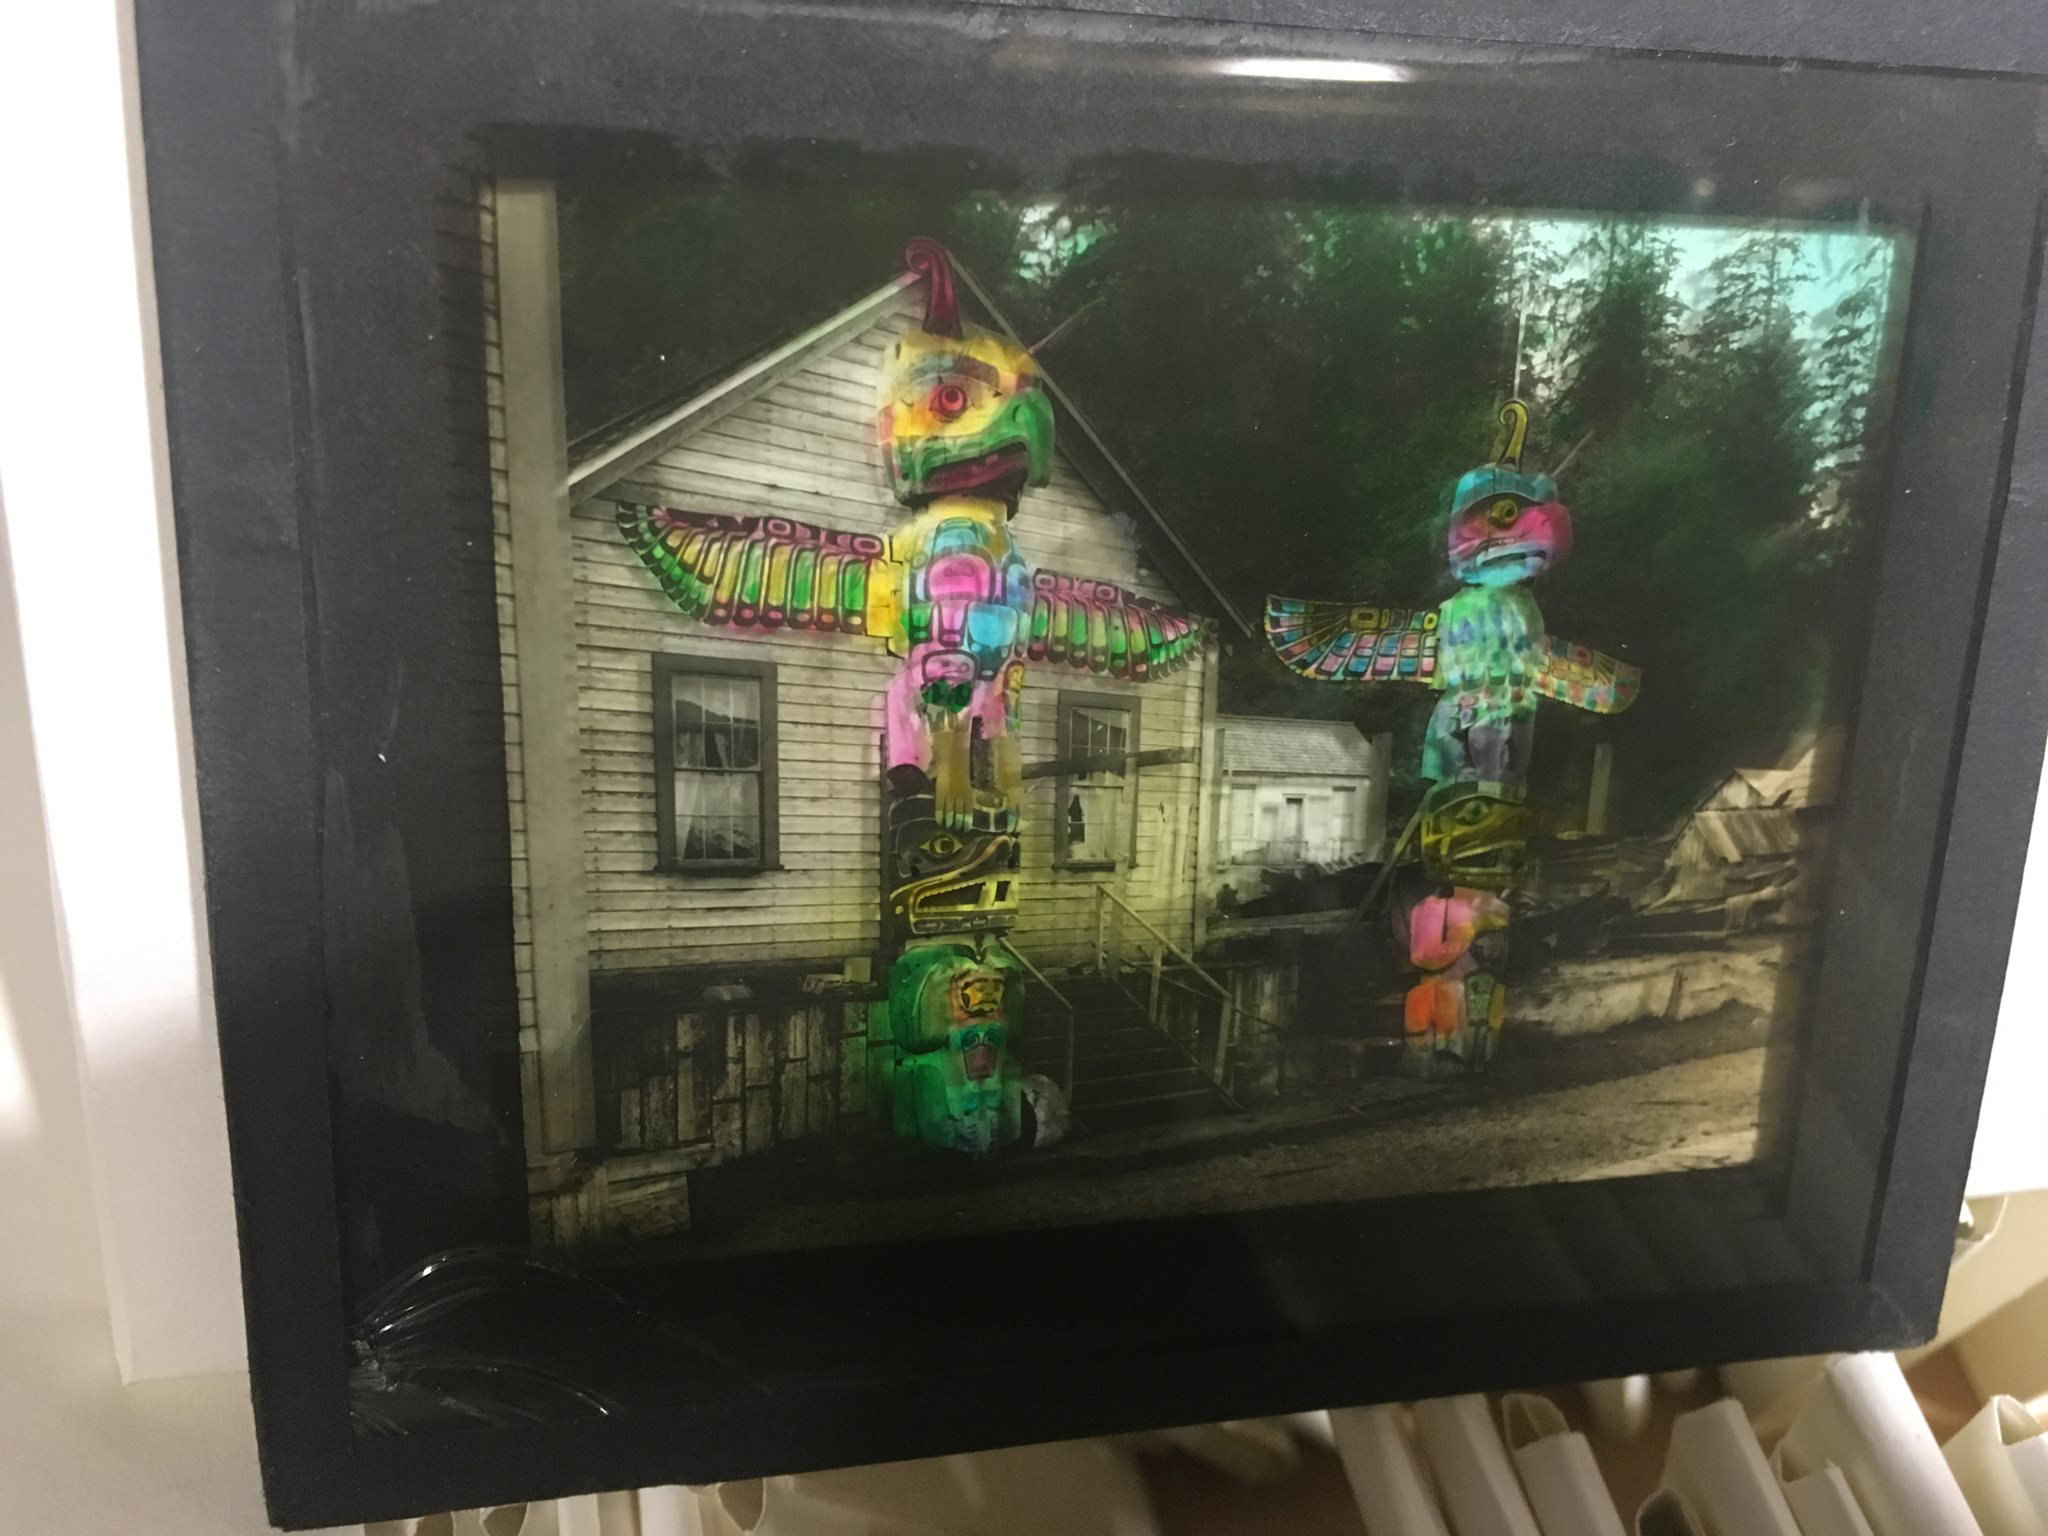
Like the original painted glass slides, prior to the advent of color photography, sometimes the images would be colored in to add yet a little more interest to the slide presentation. Like a lot of colorization that’s been done over the years, some of it doesn’t seem terribly authentic to the original. In some cases, like the totem poles pictured here, the colors were painted in to make the totem poles, the primary subject of the image, a little easier to see than they would have been in a normal black and white photograph. (It’s also probable that the ink used has undergone some color shifting over the years, too.)
But even that wasn’t where I was going with this. (Wow, I’m burying the lede today. Are you still with me?)
We have a bunch of glass lantern slides in the C. L. Andrews papers. Some are photographs he’s taken, some are ones that were purchased from commercial producers. Even though the photographic emulsions themselves are relatively stable since glass is a great relatively non-reactive medium that generally takes a very long time to degrade, they are unexpectedly heavy, and some of the glass is shattered, and it’s probably just for the best if we try to limit how much they get handled. (Papercuts are a pretty standard workplace hazard around here. We don’t want to start filling out incident reports for glass cuts too.) So when I was placing the slides in archival enclosures, and I realized the collection also had some nitrate still negatives that were a preservation problem, and I thought about how much people would like to see these images, I decided to digitize them in order to put them up on the Alaska’s Digital Archives. Increased access, reduced handling. Great idea, right?
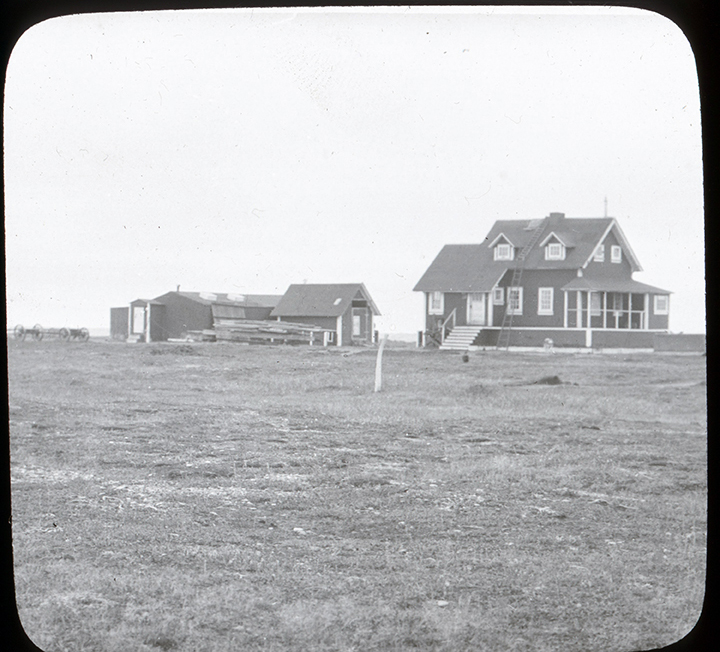
And then came a slide like this.
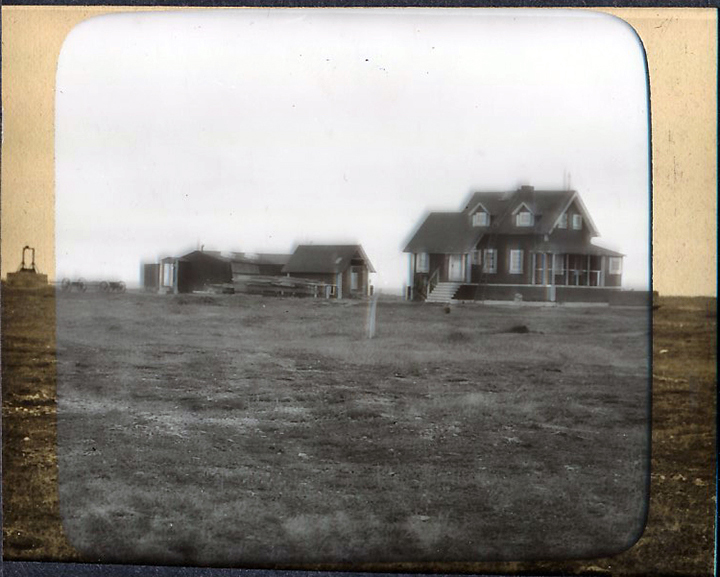
And I realized, as I placed it face down in the scanner, that oh, wait, that’s not all there is to the image. Behind that black framing on the image–not the tape around the edges of the glass but that rounded tape frame on the glass itself–is more image. Which is visible because the back side of this particular masking tape is light colored. Kind of like when you mat a photograph for framing and the mat covers over part of it.
What to do? Which is the image we present? The image as the audience member at one of the events would have seen it? Or the image as it originally existed?
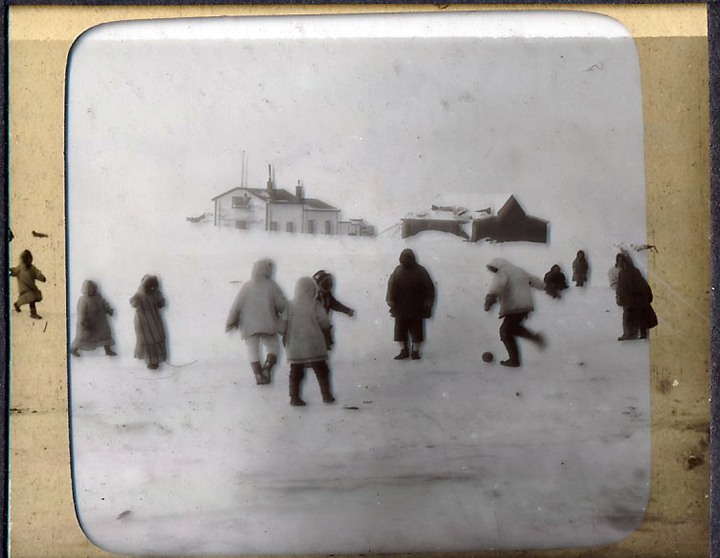
My conclusion was that we needed to do both. A lot of the slides didn’t really have a ton of additional content in that hidden section, but some did. The one above? Included an additional structure: quite a substantial one. A well maybe? And in another case, an entire person was cut off. Would most viewers care? Perhaps not, if they were simply looking for early Alaska images. But if they were researching how Alaskans dealt with water systems or maybe knew a little bit more about what was going on in the image with the people, cutting off those bits would misrepresent the scene.
But how to capture it? If I again scanned it as a transparency, the light coming through from the backlight on the scanner basically turned the light-colored image behind the frame dark, so it was still invisible. So I put the white reflective sheet back in the scanner and scanned it as a reflective image instead of a transparency which introduced a different problem. Most scanners are built to assume a certain focal distance to the image itself and that you’re not scanning something that is see-through. So the second scan, of the whole emulsion, is looking a little blurry in the transparency section but the edges, under the masking tape, are much clearer. Somebody much better with photo morphing software skills than I, or with considerably more time than I have, could probably join the two images together but to be really practical, digitizing things for the Alaska’s Digital Archives is time and money consuming enough without me adding that level of labor to the work, especially I’m choosing to present the clear, masked version alongside the mostly less than clear, back.
Because of some behind-the-scenes work being done on the Alaska’s Digital Archives, I can’t put the images up for another month or two anyhow. That buys me some time to do everything else that my job requires along with messing about with preparing the metadata for the images, some limited work I need to do with the image files themselves (contrast and color correction, inverting the images scanned as reflective since those had to be scanned face up instead of face down). And to also figure out if I want to join the two photos into a single record on the Digital Archives or if I want to load them up separately and figure out another way to connect them together. And I also need to come up with a much shorter explanation than this! for the Digital Archives information so that people looking at it online can understand what the difference between the two images is.
In other words, don’t expect to see the slides up in the next month or so. But in the meantime, I have already loaded up some of the other image files from the Andrews papers and some of them are a little reminiscent of these so you can browse through them if you like. Andrews spent time in Sitka, in Eagle (he was there when Roald Amundsen dropped by in 1905 and there’s photos of that), in Sitka, and in Nome so he traveled quite a bit across the territory taking images along the way. Also since many many archives that have Alaska content have collections of Clarence Leroy Andrews’ photographs (he sold his images commercially too), if you’re particularly interested in the content you’re seeing in ours, you can easily go looking for others online now that you have his name.
Last I’ll leave off with that other image. The one of the people where the image as presented to the audience doesn’t include a person who appeared in the original photograph. I don’t know that the person who is cut off from the presentation copy will ever be identifiable, or if there’s anything to be learned from their presence in the image, but I’ll leave that to our researchers to make the decision.


